
Get started with EngineMap
Ten minutes from an empty screen to a plan you can build from. Do the steps in order the first time. After that, jump to the one you need.
1Draw your first map
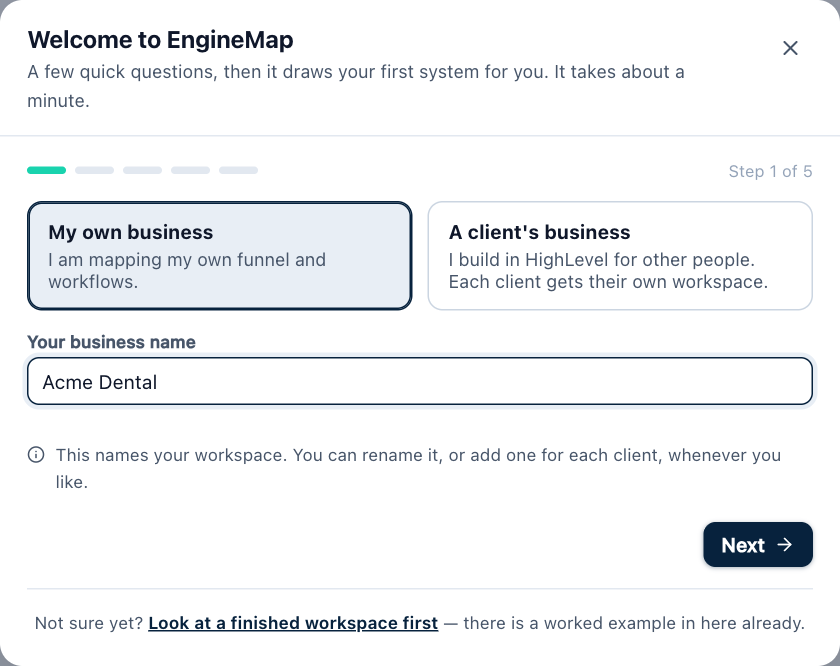
You do not start from a blank page. EngineMap asks a few quick questions and draws a whole system for you.
- Open EngineMap and answer the questions one screen at a time: who it is for, what you sell and what it costs, what counts as a win, and where your people come from.
- On the last screen, look at the funnel EngineMap picked, with the number of people and the money.
- Click Draw my map.
Tip. Every number it puts on the map is a benchmark, not your real figure. You will replace them in step 3.
2Read the map
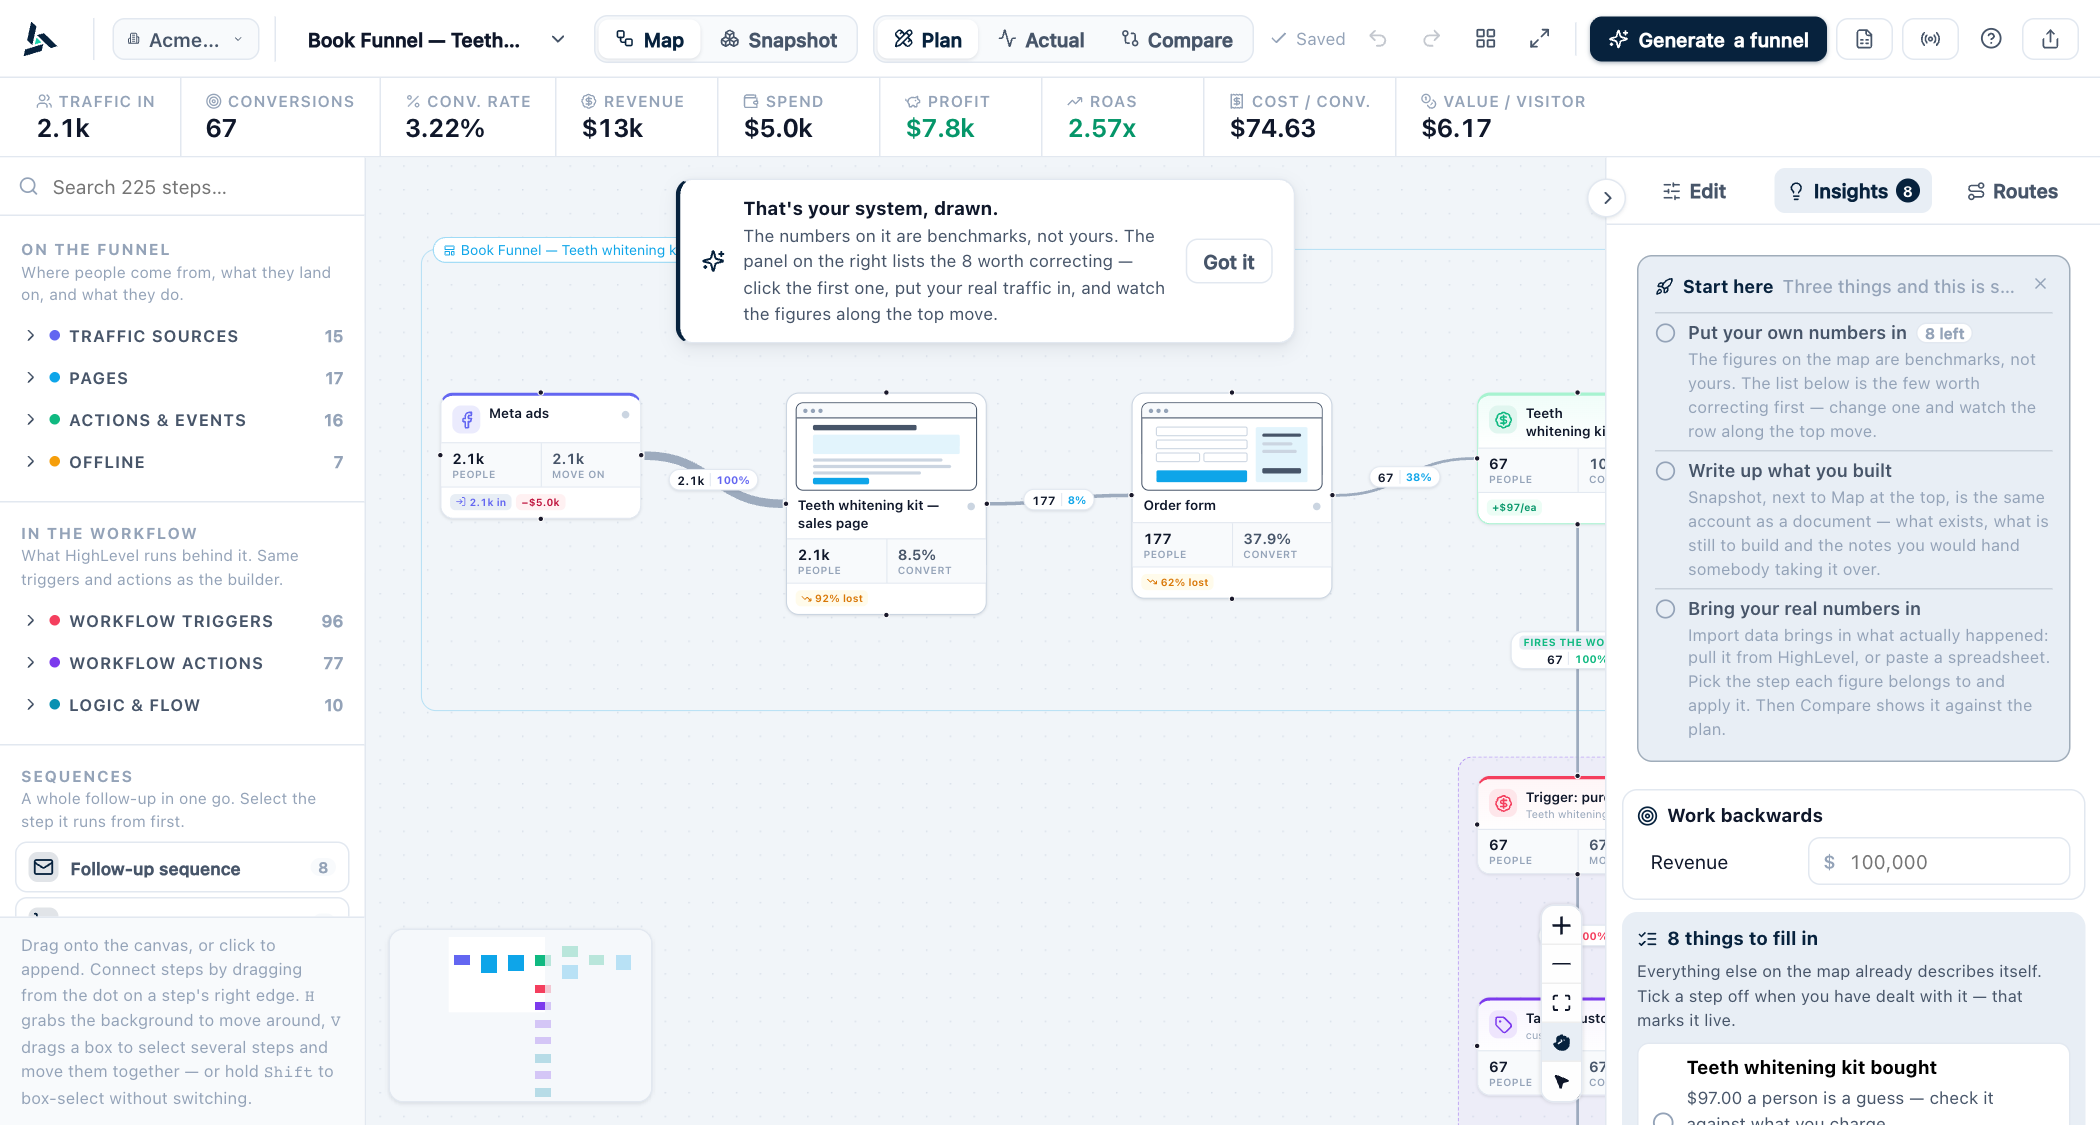
The funnel runs left to right. The HighLevel workflow it fires hangs underneath.
- Look along the bar at the top. Traffic, conversions, revenue, spend, profit and ROAS for the whole map.
- Look at each box. The big number is how many people reach it. The percentage is how many of them convert, that is, carry on.
- Look at each arrow. The number is the people who go that way, and the percentage is their share.
- Look at the frames. Each funnel and each HighLevel workflow has one, with its name on a tab.
Tip. Page boxes look like a small web page. Dark boxes are things done live, like a sales call. Diamonds are decisions.
3Put in your own numbers
This is the part that makes it click. Change one number and watch everything else move.
- Click your traffic source. In the panel on the right, type how many people come in and what they cost.
- Watch the bar along the top. Revenue, profit and ROAS change at once.
- Click a page. Under Where they go next, pick or type the share that converts. That is the page's conversion rate, and you set it on the page itself.
- Everything after it follows, the workflows included. The next step just reads out how many arrive, with a link back to change it.
- Where a page fires a workflow, choose who it fires on under Fires on: the people who carry on, the people who drop off, or everyone.
Tip. Those are the only two numbers you type in a plan: the traffic, and each step's conversion. Plan shows what you expect. Actual shows what really happened. Compare puts them side by side.
4Find where you lose money
The Insights tab on the right lists the problems, biggest money first.
- Click Insights.
- Read the top one. It says which step loses people and what they were worth.
- Click it. The map jumps to that step.
Tip. “Unrouted” is not a leak. It means you have not drawn what happens next.
5Work backwards from a goal
Type the result you want and EngineMap tells you what it takes.
- In the Insights tab, find Work backwards.
- Type the revenue you want. For example, 100,000.
- Read what it says you need: the traffic, and the share at each step in between.
Tip. If it says the goal is unreachable, your map has no number that grows with traffic. Add a traffic source.
6Change the map
The step library on the left holds every kind of step. It is in two halves.
- On the funnel: traffic sources, pages, actions and offline steps.
- In the workflow: the triggers, actions and logic that HighLevel runs behind it.
- Click a step type to add it after the selected step, or drag it onto the canvas.
- Drag from the dot on a step's right edge to another step to join them.
- Use the Sequences block to drop in a whole follow-up in one go.
- Click the name on a workflow's frame to rename it as it is named in HighLevel. To split a step into its own workflow, pick New workflow… in the panel on the right.
Tip. Press H to move the map around. Press V to select several steps with a box. Search finds steps by what they do, so “nurture” finds Send email.
7Build it in HighLevel
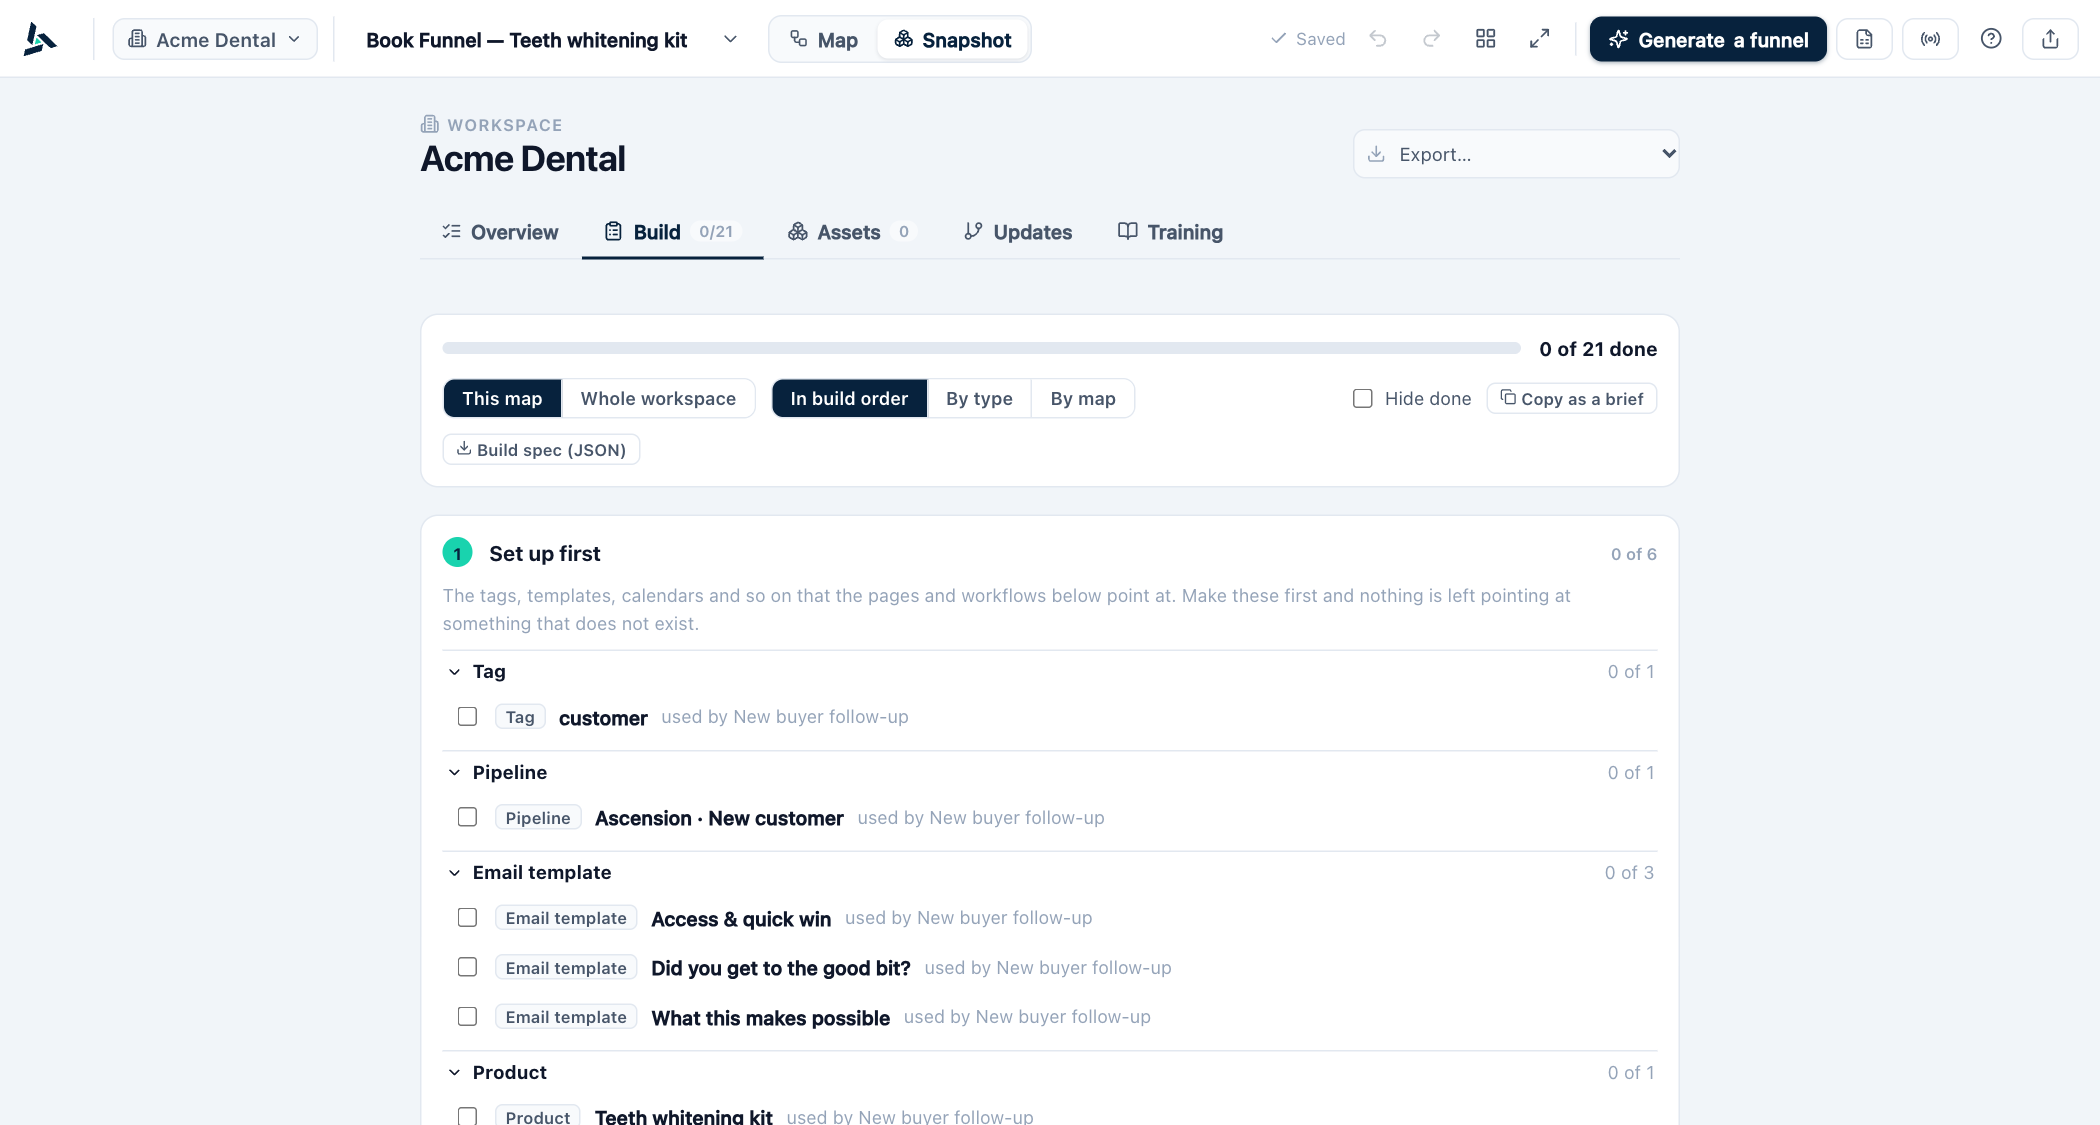
Open Snapshot, then the Build tab. It is the list of what to make, in the order to make it.
- Set up first: the tags, templates and calendars everything else points at.
- Pages and traffic: the pages and ads on your map.
- Workflows: one card for each, in the order people reach them. Open one to see its steps.
- Tick each thing when it is live in HighLevel.
- Type where it lives in HighLevel, so the next person can find it.
Tip. Use By type to do all the tags, then all the emails. Use Copy as a brief to paste the plan into a ticket or a prompt.
8Write it up
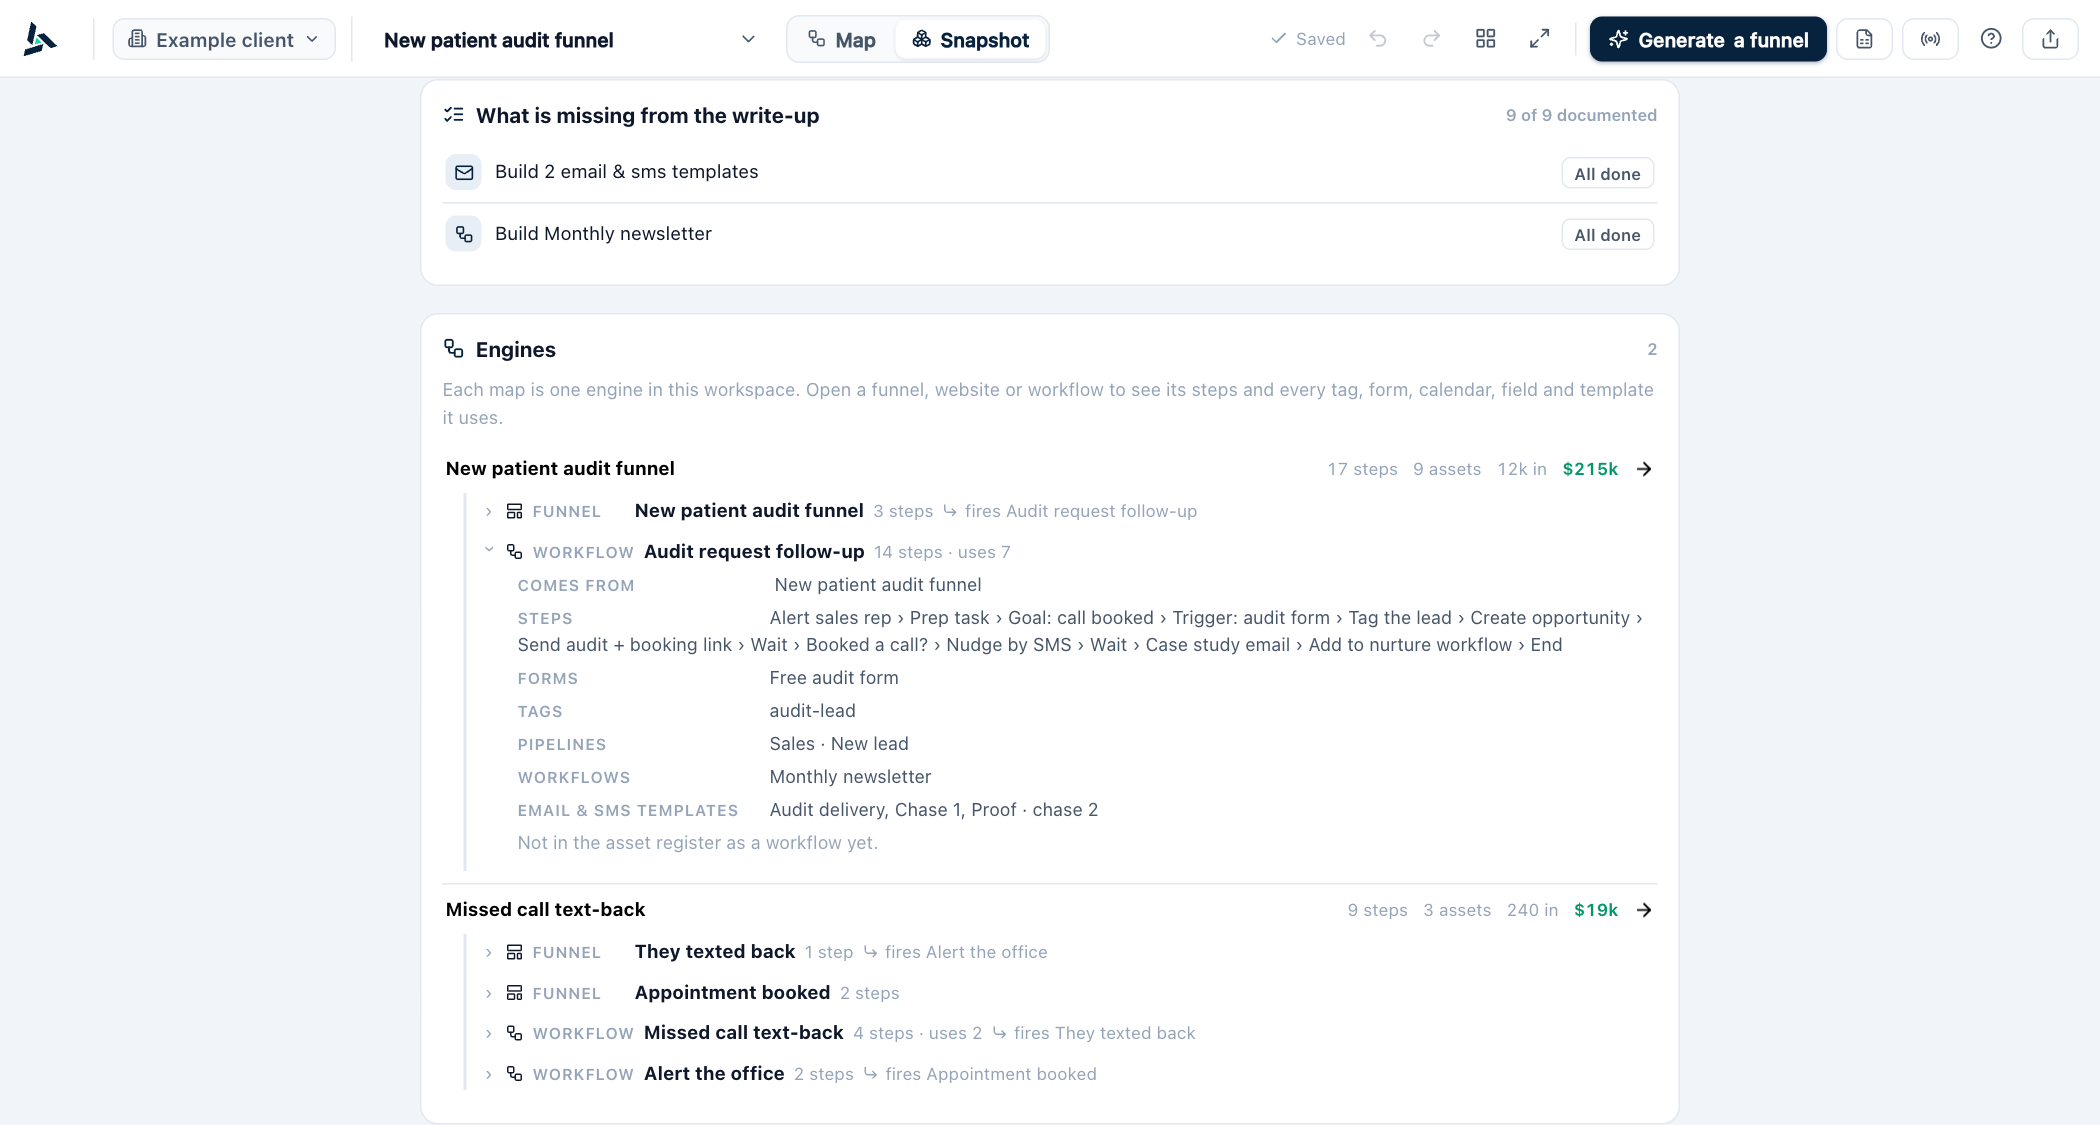
Snapshot is the same account as a document, for handing over to somebody else.
- Overview: what the account is for, what is still missing, and each engine broken into its funnels, websites and workflows. Open one to see its steps and every tag, form, calendar, field and template it uses.
- Assets: every tag, workflow, form and template with its status, grouped by engine and then by the workflow or funnel that uses it.
- Updates: a changelog. Releases: versions, if you ship in versions.
- Training: the instructions someone needs to run it.
- Export gives you a document, a spreadsheet or a bundle.
9Compare with what really happened
Once the system has run, bring in the real figures. Either pull them from HighLevel, or paste a spreadsheet.
- Click Import data. The From HighLevel tab is open.
- Click Connect an account, type your sub-account (location) id and a private integration token from that sub-account, and click Connect. You only do this once.
- Choose 7, 30 or 90 days, then click Pull the numbers. A list appears, called What HighLevel counted: pipeline stages, calendars, forms and orders, each with its full name and how many it counted.
- For each line, pick the step on your map it belongs to under Put it on this step. Leave a line on Skip this line if you do not want it.
- Click Put on the map. To use a spreadsheet instead, click the From a spreadsheet tab, paste the rows, check the columns line up, then click Apply.
- Click Compare. Every step shows plan against actual.
Tip. EngineMap never guesses which step a HighLevel line belongs to, so you pick each one the first time. It remembers your choices. Next time, click Pull the numbers and then Put on the map.
11Your account
The small things people ask about.
- Switch client: click the workspace name at the top left. Each client gets their own workspace.
- Sign out: the last row in that same menu.
- Forgot your password: on the sign-in page, click Forgot your password and follow the email.
- Your work saves as you go. The top bar says Saved.
Ready?
Open EngineMap and draw your first map. It takes about a minute.
Open EngineMap